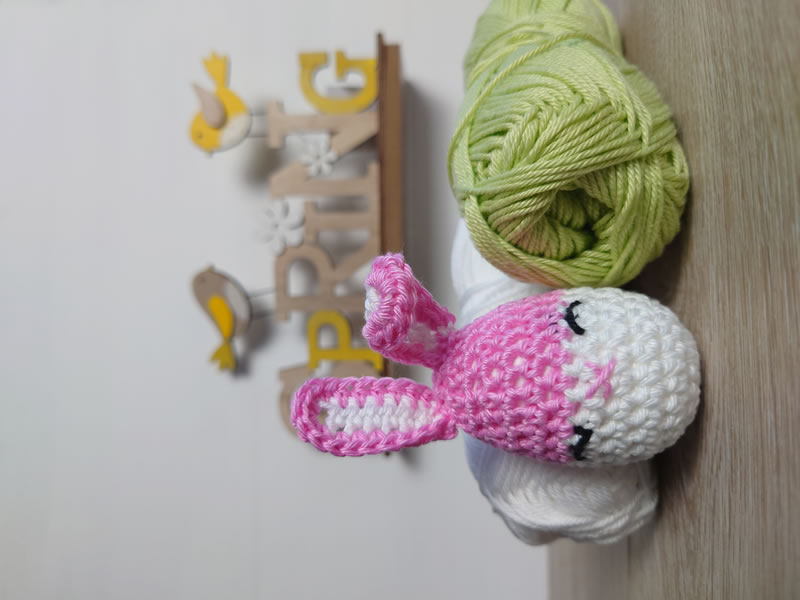
What I love about this time of year are cute and quick crochet projects that can be crocheted up really fast, so I thought I would design you this adorable little Egg Bunny pattern with the help of some photo step-by-steps. You can either make this cute egg bunny using a polystyrene egg like me or you can add stuffing. I have also added some suggestions if you want to use different sized poly eggs.
Suggested Materials
- 35mm polystyrene egg (suggestions given for larger eggs)
- Yarn weight of 2, Sport/Baby weight yarn in two colours
- 3mm crochet hook
- Yarn needle and scissors
This pattern is in US terminology. Always start your round in the same stitch as your previous slip stitch.
Round 1
In white crochet 8hdc into a magic circle or ch4 loop, sl st in first hdc to join - (8) Ch1 (
don't count as st here or throughout)
Round 2
2hdc in each st around, sl st in first hdc to join - (16) Ch1
Round 3
*1hdc in next st, 2hdc in next st* repeat from * to * until end, sl st in first hdc to join - (24) Ch1
Round 4
1hdc in each st around, sl st in first hdc to join - (24) Ch1
If you're using a larger poly egg, keep working increase rounds and then one length round at the end (just half double crochets) until your egg sits comfortably inside. Increase rounds would continue like this: *1hdc in next 2 sts, 2hdc* and then *1hdc in next 3 sts, 2hdc* and so on. See image below.
 Rounds 5 - 6
1hdc in each st around, sl st in first hdc to join - (24) Ch1. Join pink yarn in your ch1 on last round.
Your crochet should sit comfortably around your egg.
 Rounds 7 - 9
Continuing in pink yarn, crochet 1hdc in each st around, sl st in first hdc to join - (24) Ch1
Add more length rounds if needed. You want to crochet up to the beginning of when the egg starts to curve inwards.

Now we will start to decrease. If you've added more increase rounds at the beginning for a larger poly egg then you will need to decrease in the same format. So, whatever your last increase round was, it will be the same for your first decrease round, for example *1hdc in next 3 sts, hdc2tog* (using hdc2tog instead of 2sc) or *1hdc in next 2 sts, hdc2tog* etc. In-between your decrease rounds crochet a length round of just 1hdc in each st around.
But for this pattern, continue below...
Round 10
*1hdc in next st, hdc2tog* repeat from * to * until end, sl st in first hdc to join - (16)
You will need to start crocheting around your poly egg at this point. It can be fiddly so I recommend using the invisible decrease if you know it.
Round 11
1hdc in each st around, sl st in first hdc to join - (16)
Round 12
hdc2tog until end, sl st in first hdc to join - (8)
Round 13
hdc2tog until end, sl st in first hdc to join - (4) Sew remaining hole closed. Fasten off and tie in all ends.
 Ears (make twice)
In white yarn ch10, 1hdc in fourth ch from hook and in each ch to end - (7 not including 3chs at end). Join pink yarn in a ch1, TURN, 1hdc in first 7 sts, 5hdc in 3chsp, 1hdc in next 7 chs from first row. Fasten off and sew onto head. Repeat for second ear.
 Finishing
Using black yarn and pink yarn, sew on some eyes and a cute nose! And now you're done! I hope you enjoyed this bonus pattern. Make sure to tag your creations on Instagram if you use it with @happyberrycrochet so I can enjoy seeing your work. Happy Easter!!